
While being a teacher has been one of the hardest things I have ever done, it does have its advantages...
One of those advantages being having the summer "off" (this just means I get to wake up later to start working). I also get to do one of my favorite things...cook. The picture on the left is my Blessed Girl Omelette, one of BG's favorites in the morning! Never having cooked an omelette before we got married this was a daunting task...but I have overcome my fears and now I can make a pretty darn good one!
I'm going to let you in on my recipe and some of the little things I've come to learn to make this yellow bed of delightfulness.
Rule #1: Preparation if key! Omelette's cook fast, so you need to have everything ready to go so you don't overcook it.
| In the three small prep bowls are three different herbs; chives, parsley, and dill. Fresh herbs are key to a good omelette. These herbs came from our new herb garden! I chopped about one tablespoon of each herb but only use 1/2 of a tablespoon for an omelette. (You can use more or less depending on how many different herbs you use and your tastes.) Under that wonderful Pampered Chef shredder is freshly shredded gruyere cheese. I use about half a cup of cheese, but that depends on your tastes. | 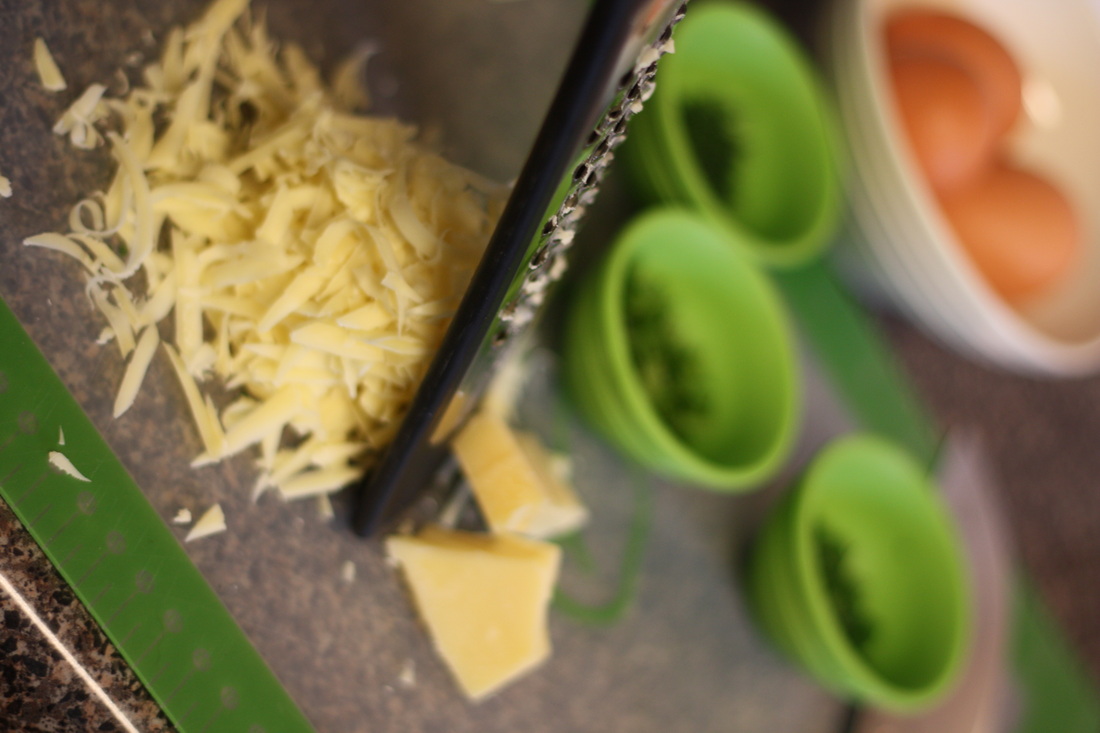 |
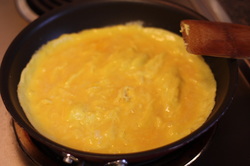
Now that you are prepped you can get cracking! Before I whisk my eggs I add about a tablespoon of cream to make the eggs fluffy. While your whisking you need to make sure your pan is warming up and your butter is melting. The pan needs to be good and hot before you pour the eggs in.
When the butter is melted and bubbling it's time to pour the egg mixture in!
When the butter is melted and bubbling it's time to pour the egg mixture in!
Rule #2: Keep the pan moving! As soon as the eggs are poured in move your pan back and forth with the spatula doing the same thing in the eggs. Continue with this process for a few minutes as the eggs firm up! Make sure you do not break the edge.
Your egg will resemble scrambled eggs but that's okay...it should look like that.
After a couple of minutes and the edges are good and firm but the middle is still a wet is when you start adding your ingredients.
Your egg will resemble scrambled eggs but that's okay...it should look like that.
After a couple of minutes and the edges are good and firm but the middle is still a wet is when you start adding your ingredients.
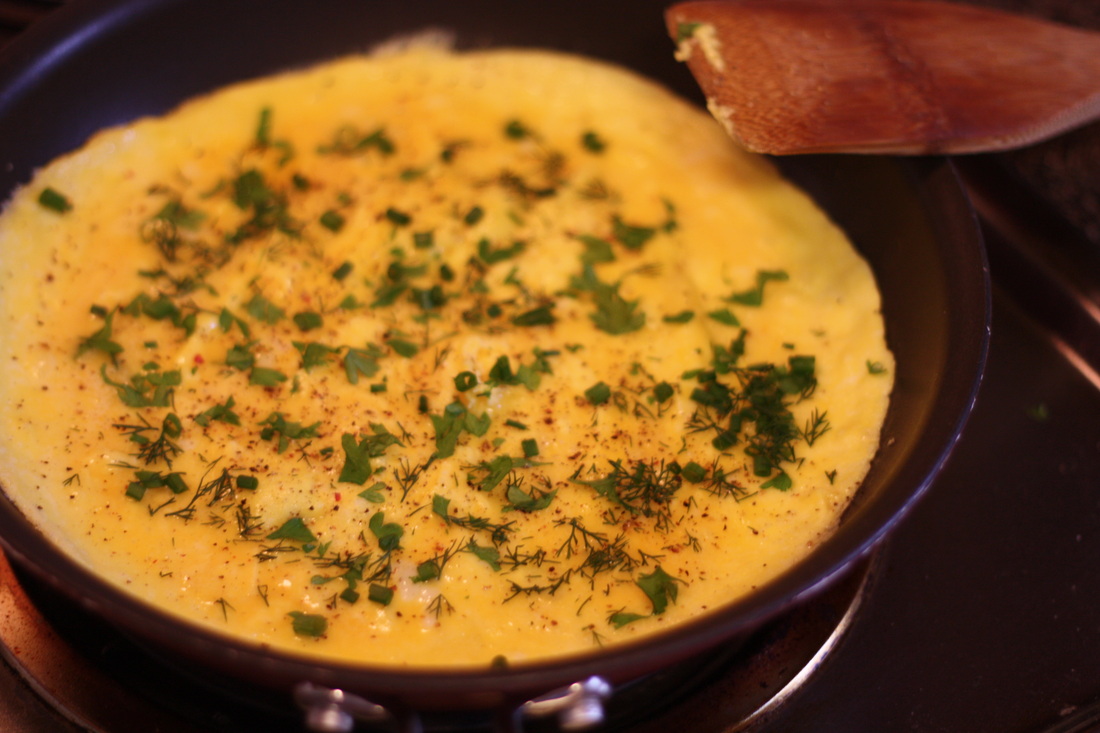
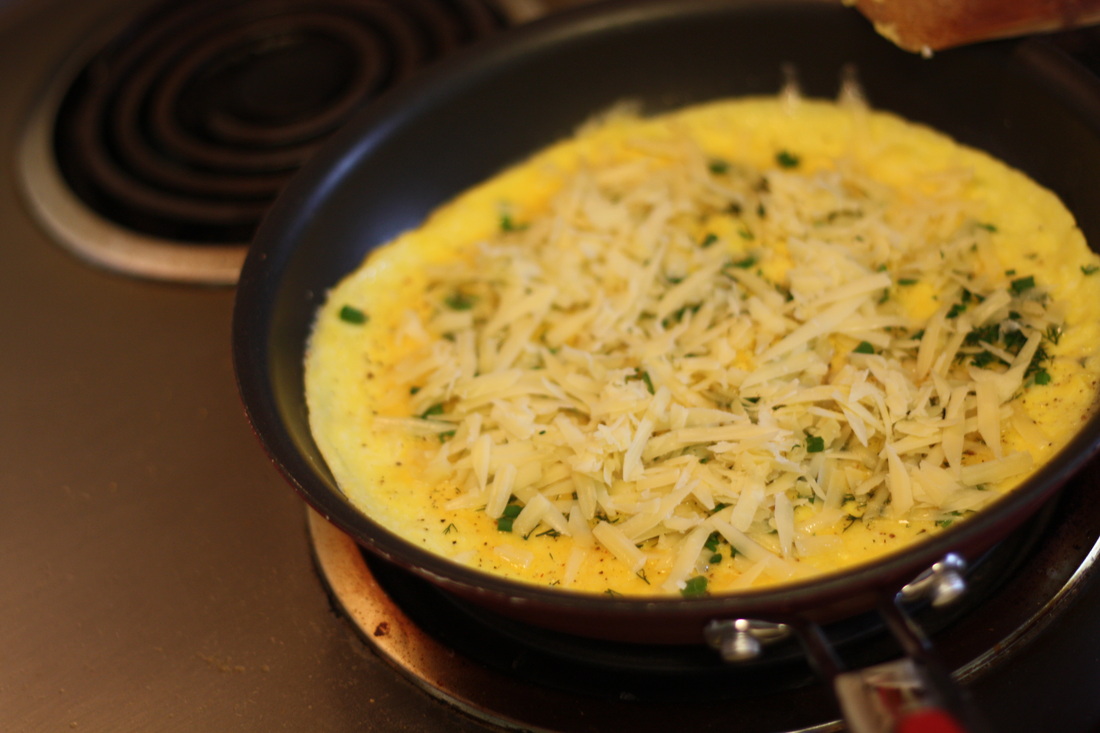
Rule #3: Don't wait. When the cheese is slightly melted it's time to do some folding and take the omelette out. It is okay if the egg is still wet, it will continue to cook even out of the pan.
With your spatula separate the edge of the egg from the pan and fold over a third of the egg.
With your spatula separate the edge of the egg from the pan and fold over a third of the egg.

With you plate ready simply slide the omelette out of the pan and let it fold up as it falls! I like to use the letter fold instead of the taco fold. It lets all that good stuff stay on the inside and when you slice into it with your fork all the melty cheese will just ooze out...
This little trick took me a few tries but once you get the hang of it it's like riding a bike!
This little trick took me a few tries but once you get the hang of it it's like riding a bike!
This is a wonderful breakfast item that my Blessed Girl loves and I love cooking for her! Enjoy!
-Honey B.
-Honey B.


 RSS Feed